ScrumGenius is extraordinarily helpful for many teams, but we know it can be difficult and complicated to get started, especially if your team isn’t very tech-savvy.
As a follow-up to the first part of our Getting Started Guide, here's how to get the most out of your workdays and maximize your team’s efficiency once you’ve started the onboarding process. Here, we focus on analytics tracking, external app integrations, record-keeping and security information.
Track Your Analytics

ScrumGenius’ analytics features can be incredibly helpful in understanding how your team works. Here’s how to use ScrumGenius’ analytics to help your team reach its full potential.
ScrumGenius’ goal, blocker and participation stats are located within the Team Dashboard. Here, you can view the report history for your team up until the very beginning of your chosen data retention period. This creates a daily record of your team’s Scrum answers, completed goals and blockers you can look back on.

If you want more detailed metrics, you can also view the individual standup history of your team by clicking on a specific team member’s avatar and selecting Participation History.
These metrics can be especially helpful for identifying patterns in team productivity. By looking at your team’s historical record over time, you can see common threads you wouldn’t normally notice, like repeated or shared blockers. This lets you know what problems to fix and which team members may need a little extra support to keep your team running as smoothly as possible.
For more details, visit our Team Dashboard and Analytics Tracking feature pages.
Use Integrations
ScrumGenius has built-in integrations with apps like GitHub, JIRA, and Azure Devops. This means that you can keep track of GitHub commits, JIRA issues and Azure Devops work items directly alongside your standup answers.
Even better, ScrumGenius also has support for many third-party integrations via Zapier, an automation tool that connects apps together in ‘Zaps’. By integrating Zapier with ScrumGenius, you can move information from platforms such as HubSpot, Google Drive and Slack directly into ScrumGenius.
Here are some of the things you can do with Zapier for ScrumGenius:
- Send updated Trello cards or completed Todoist tasks to ScrumGenius
- Add new HubSpot CRM contacts to ScrumGenius
- Send Toggl time entries to ScrumGenius
This information is stored in Team Activity and the Team Dashboard under each team member’s standup answers, so everything is viewed together as a complete picture.
These integrations are incredibly helpful for many different types of teams. Software development teams can keep track of coding issues, while designers can easily share their completed materials. Marketing teams can better keep track of their social posts, and customer service teams can record and respond to support tickets.
For more information on how to integrate ScrumGenius with project management tools like GitHub, JIRA, Azure Devops, and Zapier, visit our integrations.
Keep Standup Records

ScrumGenius makes it easy for you to collect and keep records to look back on.
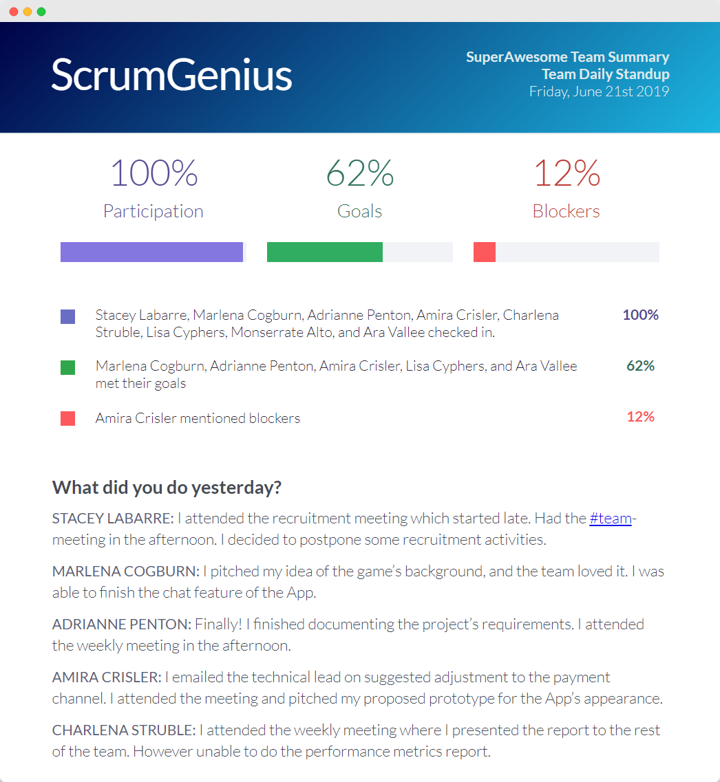
ScrumGenius automatically sends your team an email summary when the report period closes, so you can view everyone's participation count, standup answers and goals and blockers together. This helps solve problems of accountability for teams by creating a record of completed and future tasks to keep your team on the same page.
While this email summary is automatically sent to everyone assigned to the report, you can also add external participants to it. This allows people who don’t need to fully participate in the standups but would like to be kept in the loop, such as managers or company heads, to still receive the team’s responses.
Records of previous standups can also be found both in Team Activity and the Team Dashboard. As previously mentioned, the Team Dashboard houses the historical record of a Scrum report, so you can look back on your team’s statistics.
ScrumGenius also allows for this data to be exported and saved for your own records, so you can view this information outside of the platform or keep it as a backup in case records are no longer available.
For more information, visit our analytics tracking page.
Customize Your Security Policies

ScrumGenius wants to make sure all your information is safe and secure. All the data is now encrypted on disk with the industry-standard AES-256 encryption algorithm.
For more details on our data security, visit our security update.
We also recognize different companies have specific data retention policies they have to follow. Now, you can customize your ScrumGenius data retention policies to best fit your company.
To do this, go to Team Settings and find the Data Retention Policy section. Here, you can select how long you want to keep your standup data for; the range goes from 2 weeks to 2 years. For example, if you select Three Months, any data that is more than three months old will be deleted. This in turn means that you can only view report history for the last three months.

By default, we retain your team's standup data for as long as your account is active. You can also request for all the data to be deleted if you ever choose to do so.
Adapting to new software can be an ongoing process, so if you have any other questions or something you want to follow up on, visit our support pages or contact us at hello@scrumgenius.com.